CloudInsidr

Cyber security, infotech

  • Subscribe!
  • Privacy Policy
  • Legal
  • Contact Us

Join us on Twitter: @CloudInsidr

  • news & alerts
    • events
    • industry analysis
    • industry gossip
    • people
  • cloud, edge & co.
    • AWS
    • administration & orchestration
      • web servers in the cloud
      • mail servers
      • databases
  • cybersec & warfare
    • encryption
  • blockchain
Home cybersecurity and cyber warfare How to create OpenSSH keys on a Windows desktop for remote access to a Linux server with PuTTY Key Generator
How to create OpenSSH keys on a Windows desktop for remote access to a Linux server with PuTTY Key Generator

Cloud Insidr 2016-11-27 Leave a Comment

How to create OpenSSH keys on a Windows desktop for remote access to a Linux server with PuTTY Key Generator

When using authentication based on keys (as opposed to a password), you have to create the key pair—a private key and a public key—on your local machine, then transfer the public key to the server and install it there. Here is how to do this on a Windows desktop for remote access to a Linux server.

Step 1. Set up PuTTY with PuTTY Key Generator

On your local PC, download and install PuTTY with PuTTY Key Generator.

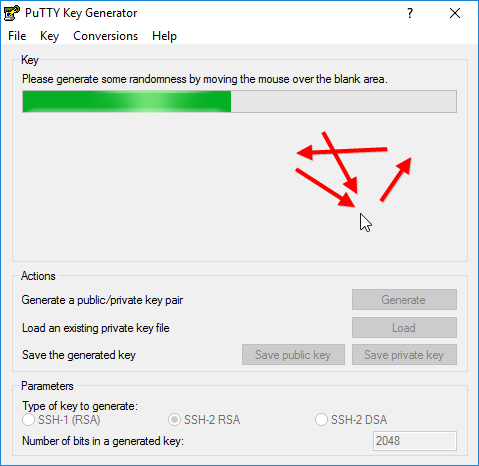
Step 2. Create your key pair

In PuTTY Key Generator, select the type of key, the desired bit length and an optional passphrase, then hit “Generate” to create a public/private key pair.

Creating a key pair in PuTTY Key Generator: random mouse movements decrease the likelihood of a successful brute-force attack on the key

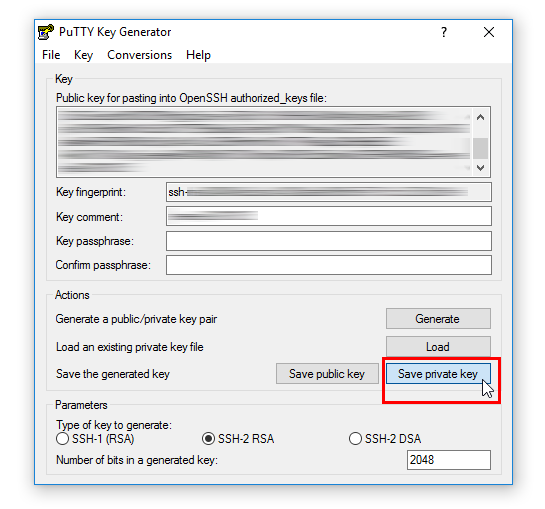
Step 3. Save your private .ppk key for use with PuTTY

Click on the button “Save your private key” to save it in a .ppk file for use with PuTTY. You can always recover the public key from the private key file (for example by loading the private key file in PuTTY Key Generator), but not the other way around.

PuTTY Key Generator: saving a private key in a .ppk file for ssh access with PuTTY

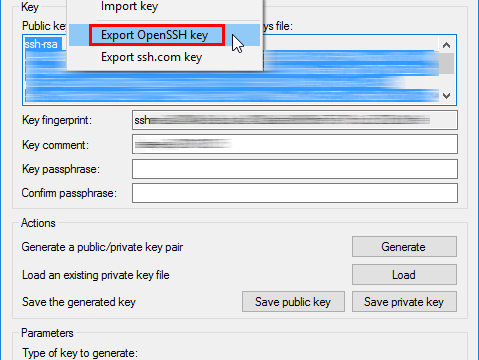
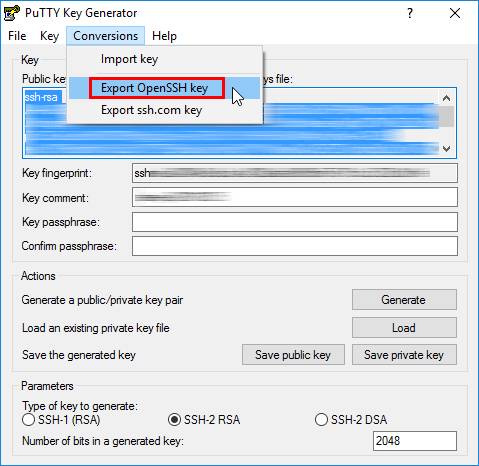
Step 4. Save your private key for use with OpenSSH

In order to save your private key for use with OpenSSH, select the command “Conversions > Export OpenSSH key” and save the file in a secure location in your home directory on your local computer. A good place to put your keys on your local Windows machine is in

C:\Users\username\.ssh

Remember: this key is your secret. Do not transfer it to the server!

export_openssh

Step 5. Save your public key for use with OpenSSH

An OpenSSH-compatible version of your public key is displayed in the dialog. Copy it into the clipboard and transfer to the server.

PuTTYGen: this is how to save your public key for use in authorized_keys

Follow these steps on how to set up remote access via SFTP to a web server root directory on RHEL/CentOS/Fedora using this key.

Filed Under: cybersecurity and cyber warfare, encryption, Uncategorized Tagged With: OpenSSH, PuTTY

Leave a Reply Cancel reply

Your email address will not be published. Required fields are marked *

Subscribe

SSL/TLS Certificate Square (250 x 250)

Pearson Education (InformIT)

SSL/TLS Certificate Medium Rectangle (300 x 250)

©2022 CybrAnalytiqa OÜ

  • Content purchasing and syndication