[updated 2018-06-12] As browser makers continue their push for HTTPS and mobile applications are becoming the target of MITM (man-in-the-middle) attacks, cloud developers and administrators are scrambling to find affordable SSL certificates that can live up to the demands of the cloud era. Enter Let’s Encrypt, a new Certificate Authority that is open, fully automated, and free to use, with an almost unprecedented, generous allotment of 100 host names per certificate. Let’s Encrypt delivers on the promise of a worry-free, fully encrypted web 3.0. Cloud Insidr lifts the veil off of Let’s Encrypt’s setup, configuration, its few surprises and hidden gems.
The breakneck pace of growth of cloud services calls for a new approach to security certificates. One such initiative is Let’s Encrypt (letsencrypt).
Let’s Encrypt is a new Certificate Authority brought to you by the Internet Security Research Group: it is free, automated, open, and backed by some of the most respected names in the IT industry.
So what’s in it for you? If you don’t mind the 90 day renewal period (with an infinite number of extensions), you can avail yourself of SSL certificates that support up to 100 domains each. What’s not to like about it? It’s automated, open, and free.
You can test-drive the letsencrypt school of thought on your web and/or mail servers. Here is how to get started.
Step 1. Check the compatibility of your software stack
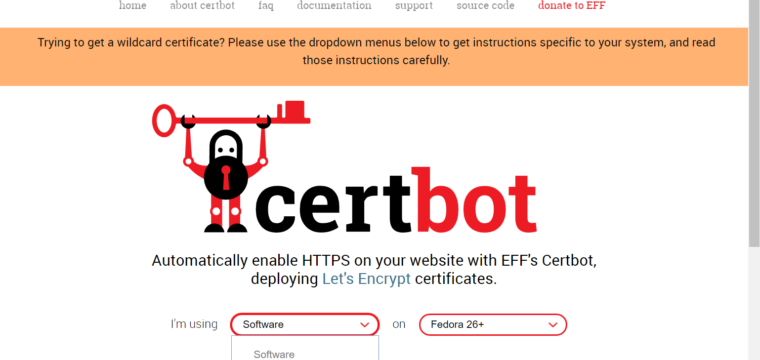
To check the compatibility of your software stack, navigate to:
https://certbot.eff.org/
and enter the details of your software stack to receive installation instructions.
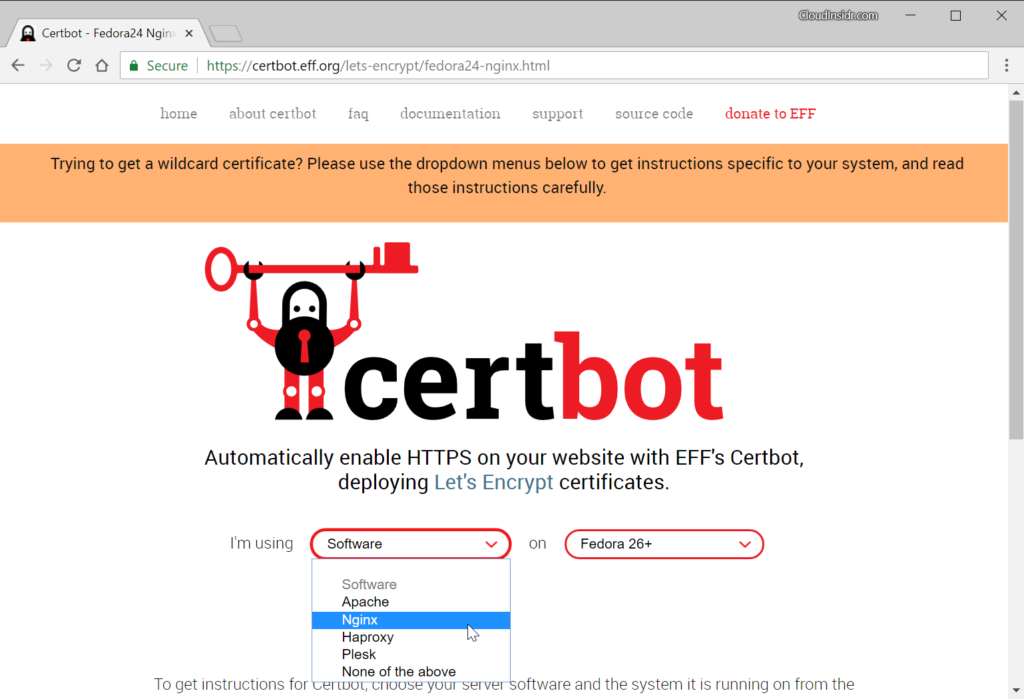
Depending on your system, you will either be using the certbot utility (on newer OSes) or letsencrypt (on older systems). If you use an alternative installation method, the script on your system may be named certbot-auto. In the following steps, these three names are interchangeable.
If you are able to install letsencrypt on the machine that will be both issuing and using the certificate(s), follow the steps below; otherwise, refer to this post for the manual method.
For example on Fedora, you can set up letsencrypt’s certbot tools for NGINX using the command:
dnf install certbot-nginx
Step 2. Complete your DNS configuration
Make sure that the DNS configuration of your server is correctly referencing the IPv4 and IPv6 address of the host which is going to be furnished with the certificate(s).
Step 3. Set the defaults for letsencrypt
To set global defaults for letsencrypt, create the cli.ini configuration file.
nano /etc/letsencrypt/cli.ini
For example, to use a 4096 bit RSA key instead of 2048, save this information in the cli.ini file, preferably in its default location at /etc/letsencrypt/:
# Use a 4096 bit RSA key instead of 2048
rsa-key-size = 4096
Configuration files responsible for setting up certificate-specific defaults for letsencrypt are located in the following directory:
/etc/letsencrypt/renewal
Make a backup of these files.
Step 4. Generate a new or extend an existing certificate
The certbot/letsencrypt utility uses plugins which can provide the following functionality:
- authenticators obtain a certificate
- installers save it in /etc/letsencrypt on your machine and can also modify your web server configuration.
To select a plug-in, you add the appropriate flags invoking the certbot/letsencrypt utility. For example, to issue a certificate for NGINX on Fedora, use:
# certbot --nginx
The above command will attempt to add NGINX directives to the web server configuration files.
Tip: Running certbot/letsencrypt with the option –dry-run allows you to test a command without using up your weekly allotment.
# certbot --nginx --dry-run
To obtain only the certificate and skip the server config, try:
# certbot certonly --standalone
Saving debug log to /var/log/letsencrypt/letsencrypt.log
Plugins selected: Authenticator standalone, Installer None
Depending on the mode you invoke, you may be required to stop your web server. If you want to avoid service interruptions, use the –webroot plug-in with the –webroot-path option (-w) specified. In order to generate a certificate, you could invoke certbot/letsencrypt for example like this (–dry-run won’t issue any actual certificates):
certbot certonly --dry-run --cert-name cloudinsidr.com --rsa-key-size 4096 -w /var/www/www.cloudinsidr.com -d www.cloudinsidr.com -w /var/www/www.cloudinsidr.com -d cloudinsidr.com
The above command also specifies the RSA key size.
The standalone mode allows you to issue certificates without a web server running, for example for a MTA like Postfix or an MDA like Dovecot.
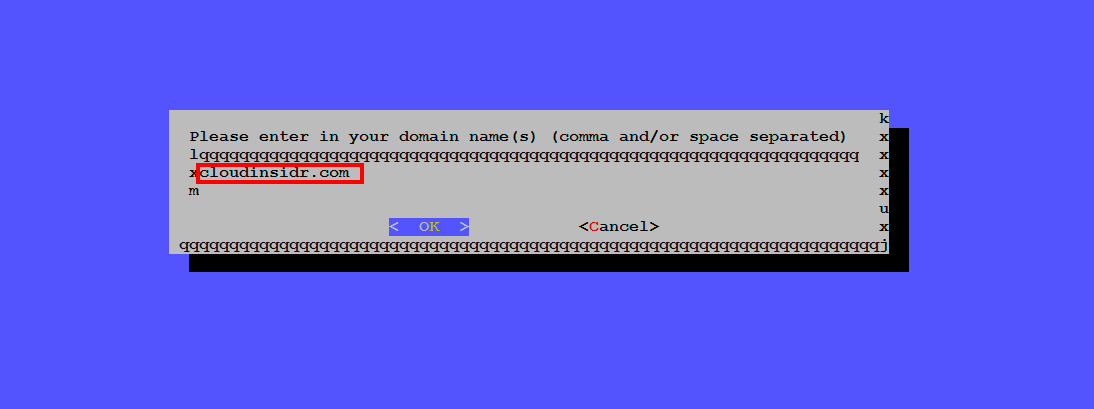
certbot certonly --standalone --dry-run --cert-name cloudinsidr.com
Enter the domain name(s) and confirm.
You could also try the old command:
letsencrypt --server https://acme-v01.api.letsencrypt.org/directory auth -d www.cloudinsidr.com -d cloudinsidr.com
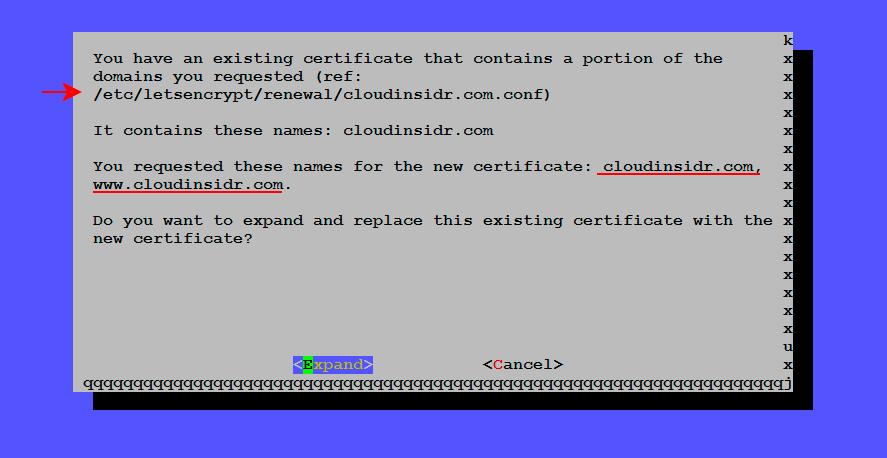
If you happen to be extending an existing certificate, letsencrypt will prompt you for confirmation.
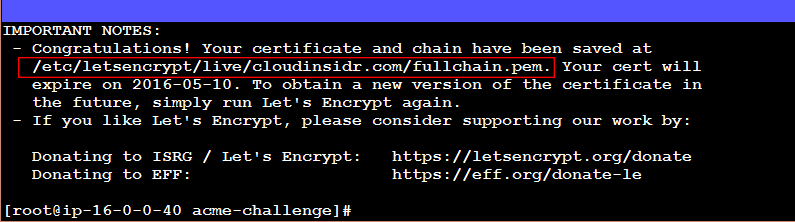
You should receive a confirmation containing the location of symlinks that point to your certificates. Navigate to that directory and list its contents.
Step 5. Make a note of the file names
Make a note of the names of the symlinks and their location. You will need to enter these absolute paths in the appropriate configuration file of a software so it can use this information.

(Adjusting SELinux labels is certainly worth considering as well.)
Step 6. Correct file system permissions on letsencrypt certificates
Permissions 0644 for ‘/etc/letsencrypt/live/byleapsandbounds.net/privkey.pem’ are too open. It is required that your private key files are NOT accessible by others. To change the permissions, use these commands:
find /etc/letsencrypt/archive/ -type d -exec chmod 700 {} \;
find /etc/letsencrypt/archive/* -type f -exec chmod 600 {} \;
Step 7. Restart your web server
Once you complete the process of creating certificates, remember to start Nginx:
service nginx start
Step 8. Adjust the NGINX configuration files
Point your web server to the new certificate and key:
ssl_certificate /etc/letsencrypt/archive/cloudinsidr.com/fullchain1.pem;
ssl_certificate_key /etc/letsencrypt/archive/cloudinsidr.com/privkey1.pem;
ssl_trusted_certificate /etc/letsencrypt/archive/cloudinsidr.com/chain1.pem;
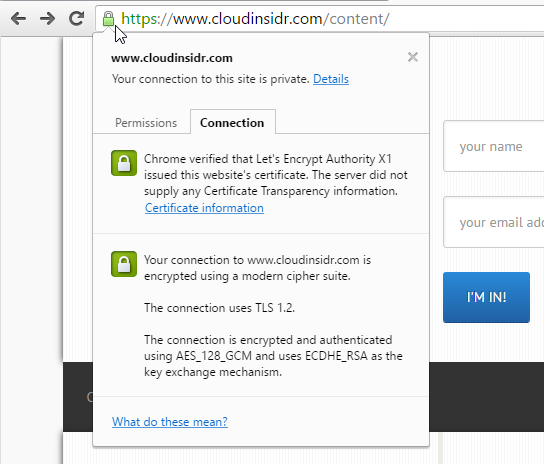
(For more information on how to properly configure HTTPS, see “How to Activate HTTP/2 with TLS Encryption in NGINX for Secure Connections without a Performance Penalty“)
When this is done, restart NGINX:
service nginx restart
How to configure letsencrypt in the manual mode
If you need to issue certificates for another server (on which you weren’t able to install letsencrypt for whatever reason), you need to create a certificate signing request (SSR). Follow the steps in this post to complete the process.
Automating renewals
By setting up a cron or systemd job, you can automate letsencrypt renewals.
Leave a Reply