
Expanding an EBS volume is not quite as easy as recreating it from a snapshot with a larger volume size. It involves a few more steps.
“Elastic” Block Store is not so elastic after all.
Expanding an EBS volume involves quite a few steps. You may have already tried to:
- unmount the EBS volume you want to expand (or freeze write access to it);
- write a snapshot;
- create a new, larger EBS volume based on the snapshot of the old, smaller volume;
- attach the new, larger EBS volume to your EC2 instance;
- mount the new volume on the instance;
- hit a wall: no amount of xfs_growfs’ing seems to get the job done and expand it even a tiny bit.
Here is how to fix it (fast-forward to step 5 below).
Step 1. Unmount your xfs volume (or freeze write access to it)
On EC2, you can usually get away with just creating the snapshot without much ado. If you are paranoid about data loss, you probably want to unmount the volume (since you may need to do this anyway), or at least lock write access to it.
Unmounting the volume involves the following command:
umount /mount/point
If you prefer to freeze write access to it, use this command instead:
xfs_freeze -f /mount/point
Once you get to the point of being ready to unfreeze it,
xfs_freeze -u /mount/point
will do the trick.
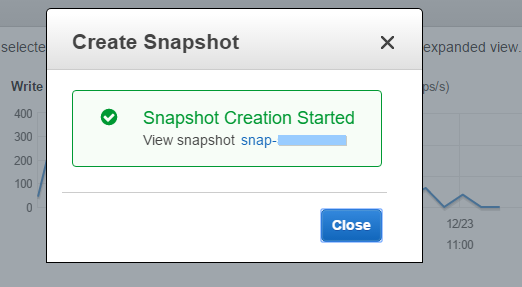
Step 2. Write a snapshot of the EBS volume
Create a snapshot of your EBS volume on AWS EC2. When using the AWS Management Console, navigate to the section Volumes, find your volume, select it, and use the command Create Snapshot from the Actions menu to initiate the process.

The snapshot will be placed in the Snapshots section of the Console and display the size of the original EBS volume from which it was created.
Step 2. Create a new, larger EBS volume based on the snapshot of the original, smaller EBS volume
Navigate to the section Snapshots of the AWS Management Console for EC2, find your snapshot, select it, and use the command Create Volume from the Actions menu.
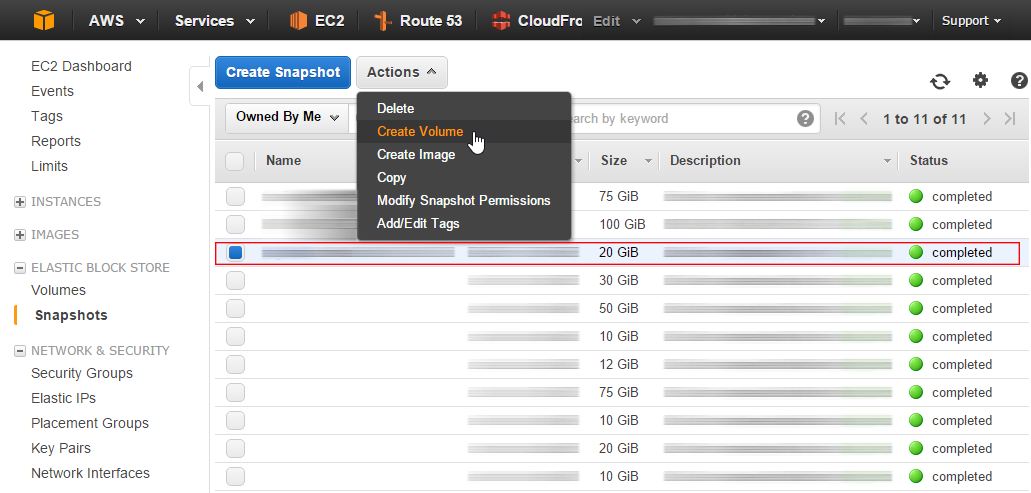
In next dialog that appears, set the new size you want to expand to and select an availability zone (AZ) for the new volume so you can attach it to your instance (the new volume must be located in the same AZ as the instance it will attach to).
The new volume appears, quite predictably, in the Volumes section of the ECS Management Console, and has the new, larger size. Hurraaah! (Not so fast… Son’t celebrate just yet.)
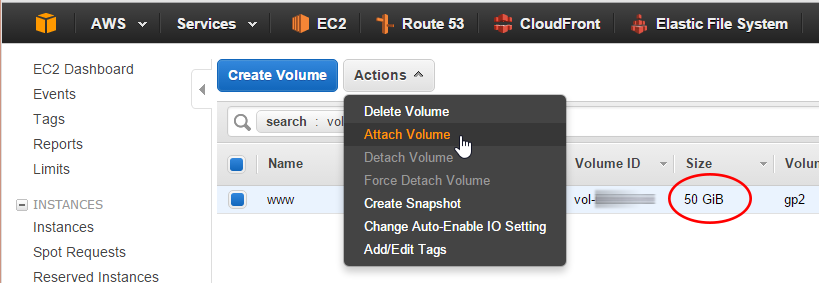
Step 3. Attach the new, larger EBS volume to your EC2 instance
Select your shiny new, larger volume in the Volumes section of the AWS Managment Console and use the command Attach Volume to hook it up to a running instance in the same availability zone.
Select your instance, confirm the device ID and hit Attach.
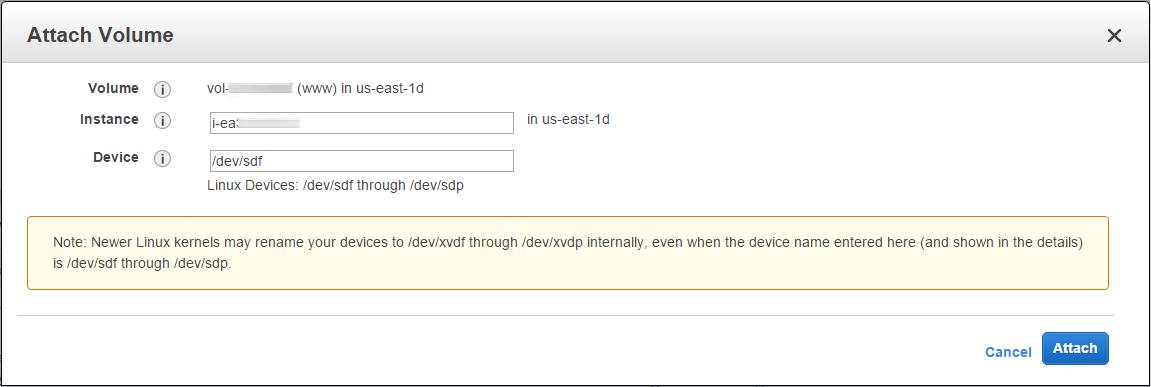
Verify that the volume has attached by taking a cursory glance at the Description tab in the Instances section of the AWS Management Console for your EC2 instance. (You may need to hit the Reload button at the upper right-hand corner of the Console; don’t hit the browser button–that one would reload the entire page and deactivate your current selection of your EC2 instance as well as any view filters.)
Step 4. Connect to your EC2 instance and mount the volume
Connect using an ssh client such as PuTTY, then switch to root (sudo su).
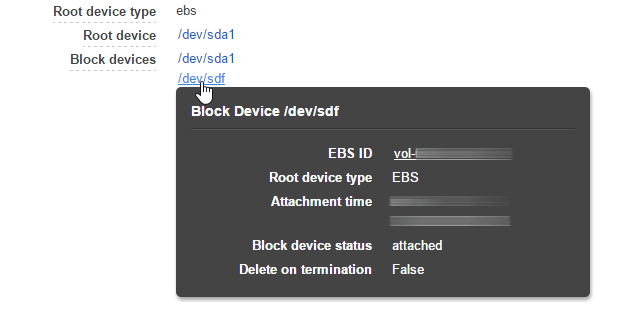
View block devices
For NVMe, see: How to attach and mount an NVMe EBS volume on EC2.
For legacy SATA drives, the command:
ls /dev/x*
should show something to this effect:
/dev/xvda /dev/xvda1 /dev/xvdf /dev/xvdf1
Your boot volume in the above example is /dev/xvda; the boot partition is /dev/xvda1, the newly attached volume is /dev/xvdf with the data partition being /dev/xvdf1.
Repair the xfs file system on the newly mounted volume (optional, but recommended)
If you need to repair the XFS file system on the volume, use xfs_repair:
xfs_repair /dev/xvdf1
Mount the xfs file system partition
In order to mount the file system you need a directory that will serve as the mount point. Create a new directory (sudo su makes you root):
sudo su

mkdir /mnt/www
Mount the file system (example mountpoint):
mount /dev/xvdf1 /mnt/www
Verify the capacity of the xfs partition
The volume will show up at its original capacity stored in the AWS snapshot:
df -h
Now what?
Step 5. [OPTION 1] Grow the xfs partition: adjust the partition size using growpart and xfs_growfs
First, use growpart to extend the first partition on the volume:
growpart /dev/xvdf 1
Now, you can extend the XFS file system (while still mounted) using the xfs_growfs command (see manpage for options):
xfs_growfs /mount/point
(Without the -D size option, xfs_growfs will expand the file system to the maximum size supported by the device).
Step 5. [OPTION 2] Grow the xfs partition: adjust the partition size using fdisk
You can also grow the partition using fdisk.
Call fdisk on the newly mounted block device
Call fdisk on the block device that represents the new EBS volume that needs resizing:
# fdisk /dev/xvdf

Welcome to fdisk (util-linux 2.23.2).

Changes will remain in memory only, until you decide to write them.
Be careful before using the write command.
Print the partition table of the disk you selected above using the command p:
Command (m for help): p

Disk /dev/xvdf: 53.7 GB, 53687091200 bytes, 104857600 sectors
Units = sectors of 1 * 512 = 512 bytes
Sector size (logical/physical): 512 bytes / 512 bytes
I/O size (minimum/optimal): 512 bytes / 512 bytes
Disk label type: dos
Disk identifier: 0x9e5f5b78

Device Boot Start End Blocks Id System
/dev/xvdf1 2048 41943039 20970496 83 Linux
All of a sudden, fdisk has just confirmed your desired new volume size.
Delete the data partition in fdisk (but don’t write the changes yet!)
Delete the data partition on your volume (don’t worry, your data will be preserved, just make sure you select the right partition, which is partition 1 in the example):
Command (m for help): d
Selected partition 1
Partition 1 is deleted
How does it feel now?
Still worried? Why don’t you create a new partition (see below).
Create a new partition on the newly mounted block device in fdisk
Create a new partition in fdisk by using the n command with option p for primary and all other options confirmed at their default values. This is how it looks in our example:
Command (m for help): n
Partition type:
p primary (0 primary, 0 extended, 4 free)
e extended
Select (default p): p
Partition number (1-4, default 1):
First sector (2048-104857599, default 2048):
Using default value 2048
Last sector, +sectors or +size{K,M,G} (2048-104857599, default 104857599):
Using default value 104857599
Partition 1 of type Linux and of size 50 GiB is set
Here you have your partition back.
Write changes to the device in fdisk
So far, no changes have been written to the disk as of yet. To do this, use the w command (for write):
Command (m for help): w
The partition table has been altered!

Calling ioctl() to re-read partition table.
Syncing disks.
Mount the newly expanded data partition
Now is the time to mount the newly expanded data partition:
mount /dev/xvdf1 /mnt/www/
Verify that your data is still on it:
ls -l /mnt/www/
The volume size remained unchanged:
# df -h
Filesystem Size Used Avail Use% Mounted on
/dev/xvda1 10G 2.5G 7.6G 25% /
(...)
/dev/xvdf1 20G 246M 20G 2% /mnt/www
Expand the xfs file system on the newly expanded partition
To expand the xfs data partition to the maximum size supported by the device, use this command:
# xfs_growfs -d /mnt/www
You should see roughly this output as a result:
meta-data=/dev/xvdf1 isize=256 agcount=4, agsize=1310656 blks
= sectsz=512 attr=2, projid32bit=0
= crc=0 finobt=0
data = bsize=4096 blocks=5242624, imaxpct=25
= sunit=0 swidth=0 blks
naming =version 2 bsize=4096 ascii-ci=0 ftype=0
log =internal bsize=4096 blocks=2560, version=2
= sectsz=512 sunit=0 blks, lazy-count=1
realtime =none extsz=4096 blocks=0, rtextents=0
data blocks changed from 5242624 to 13106944

Now you can finally get to admire the new, larger volume size:
# df -h
Filesystem Size Used Avail Use% Mounted on
(...)
/dev/xvdf1 50G 247M 50G 1% /mnt/www
How’s that for a reason to celebrate!
Adjust /etc/fstab
If you would like the volume to mount automatically after each reboot, enter this line into /etc/fstab (add spaces as you see fit):
/dev/xvdf1 /your/mountpoint xfs defaults 0 0
Reboot your system to verify that the volumes mount correctly, and you are done.
Why don’t you subscribe to our newsletter to receive solutions to your problems, tips, and special offers, straight to your email box, for free :
[wysija_form id=”1″]
Alert: With the Elastic File System (Amazon EFS), AWS has created what EBS should have been from the get go: network-attached EC2 volumes-as-a-service that grow as your data grows. They can be accessed from more than one EC2 instance at a time, but they are a bit more expensive than EBS.
Related: How to Restore Your Instance Data from a Backup using Snapshots on AWS EC2/EBS – Cloud Insidr.
Leave a Reply